So, sticking with the bread week & all…I decided to play around with the dough from the Bread Clay Beads a little bit & make it mama project worthy ;)
And by golly I wasn’t going to let the rest of the loaf of white bread go to waste either!
So, the bones of this tutorial are similar to yesterday’s post, with a few little tweaks here & there.

Materials
- 6 pieces white bread (the super cheap stuff)
- 3 TBS white glue (I used Elmer’s)
- clear dishwashing liquid
- food coloring (I used these neon colors)
- bead/button
- E6000 craft adhesive or a comparable heavy-duty craft glue
- frame (optional)
Tools
- food processor
- workable mat (I used an old cutting board)
- wax paper

So, with this mama bread clay version, since I didn’t have miss V’s little hands assisting me, I threw the bread, glue, and a couple of drops of dishwashing liquid into the food processor until crumbly.
When I did this version, the mama version, the dough came out a very different consistency by combining it in the blender versus just by your hands. The consistency was smoother & more like modeling clay.

So, go ahead and rub your hands completely in dishwashing liquid to make a seal from the dough’s stickiness. Remove from the food processor and knead until it is no longer sticky. Mix thoroughly with your hands, adding more glue if the dough is too dry or more dishwashing liquid to your hands if the dough starts to stick to your hands.
After it is combined, divide the dough into separate batches for each color you would like to make. Add several drops of food coloring to each ball and blend thoroughly to get the color you wish to achieve; you may need to add more drops for your desired color.
At this point you can either put the dough into baggies & refrigerate it to work on it later or start molding right away.
I molded my clay right away into little balls, then flattened them. I then molded each petal to make them more organic looking with indentations. I placed the petals on top of each other going around in a circle, placing and molding in the center to mold together as I went around the flower. Once I was satisfied with the way my flower looked I added a button to the center to secure its location once dried. It is important to do this because once the flower is dry you will have that impression in the center which will make gluing it down easier. Let flower dry for 48 hours on wax paper (time may be less or more depending on the size & clay involved in your flower), then glue down the button with the E6000 glue on the center impression you made prior to drying.

Voilà – you are done – you now have a pretty little clay flower!
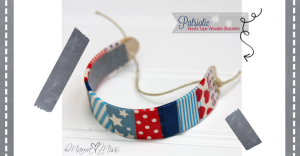
I put my little flower on a frame, but the sky is the limit on what you can put this lovely little flower on; a frame, hairclip, headband, artwork, mirror…etc., etc., you decide.

I soooo would love to see your final product & what you came up with!!

♥
Like what you see?!
You can connect with me on:
Pinterest || Facebook || Twitter || Google +
♥
© Mama Miss. All images & content are copyright protected.
Feel free to share ONE picture and linking directly to this post for download.
Please do not copy directions, ingredients, or pdf files for your own website or Facebook page, visuals or words.
Copying my post partially, or fully, is strictly prohibited.
All work by Mama Miss is licensed under Creative Commons Attribution-NonCommercial-NoDerivs 3.0 Unported License.
♥♥♥
i love the idea! but i was wondering how long would it last……wouldn’t it get rotten or sth?
Hey there! Not sure on its life span, but I’ll definitely update the post if I notice the flower rotting away :)
I’m thinking because of the paste in it, it wouldn’t rot, but I’m no scientist ;) You could also spray it with a sealant of some-sort too, to lock it all down. Hope that helps! Thanks for stopping by.
xx ♥ m
I have never heard of making clay from bread. What a cool idea! I love that it can be a kid or mom craft!
Bethany, you should definitely try it out, V had a blast with the kids version & I still have the pink ball of the mama version in the fridge to make something later :) Thanks for stopping by & your sweet comments!
xx ♥ m
I absolutely love the flower – just think of all the kinds that you could make!!! Fabulous idea!
Thanks Mom! I know, there are so many shapes, sizes & colors you could come up with!! Like I don’t have enough on my plate that I need to add a stream of clay flowers, you got those wheels turning in my head now – LOL! ;) Love you.
xx ♥ m